|
 Plain photo > Duotone composite Plain photo > Duotone composite
This tutorial began with an answer I wrote to an email. I had put it in my Ask the Goddess column, and someone suggested that people may want to see it here. This tutorial works for PS 5.5 +, but i did it with PS 7, so that's where i got the screenshots.
Question:
I would like to do a duotone photo. All duotone except one certain item on that photo (like a flower). That flower I would like to keep the original colors. How do I do this???
Thanks Susan
|

|
|
Answer:
What we will do here is to begin with TWO versions of our photo. One will be a duotone, and the other will be as it was to start. First, let's make the duotone.
To get a true duotone, you need to use duotone mode, and this will ditch all your other color information. But there is a way to do what you want.
Here's how:
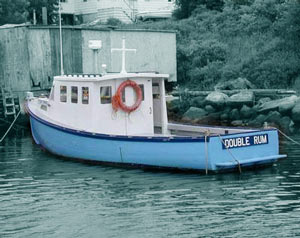
1. Open your file ;).
|
 |
|
2. Image > Duplicate. This will make another document from your file. Save as... and name it something different. You now have two images just alike, on your desktop.
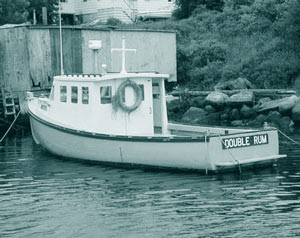
3. Now, make the new one into a duotone:
- Image > Mode > Grayscale.
- Image > Mode > Duotone .. pick your colors and tweak it how you need it.
|
 |
|
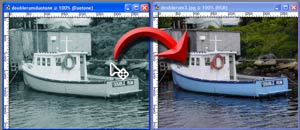
4. With your files side by side, drag the duotone over to the straight version. Hold SHIFT as you drag, to center the duotone atop the original on the canvas. This will give you now two LAYERS on the original file, and you can see both of them in your layers palette.
|
|
|
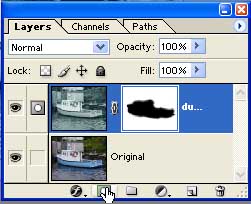
5. With the Duotone layer active, click the Create New Layer Mask icon at the bottom of the Layers palette.
|
 |
|
6. With black, paint away the part that you do NOT want to appear in duotone.
7. If you need this file for use this on the web, or need to save this in TIFF format, you will need to convert the file back to RGB first. Image > Mode > RGB. That's it! :)
|
|
I hope you enjoyed this tutorial!

|
|