Making a Line Drawing from a Photo Making a Line Drawing from a Photo |
 |
| In this tutorial, you will work with some interesting filters and techniques to create a line-drawing from a photo. There are several ways to achieve a similar effect and though my result is good, in my not so humble opinion, this might not be the easiest or the "best" way to accomplish this.
As you work through this tutorial, you will get some practice with using some nifty filters and techniques, some of which may be new to you. These include sharpening with the unsharp mask filter, working with the high-pass filter, and using hue/saturation, threshold, and levels adjustments.
If you like this sort of thing, you'll LOVE my Photos into Artwork class! Check it out!
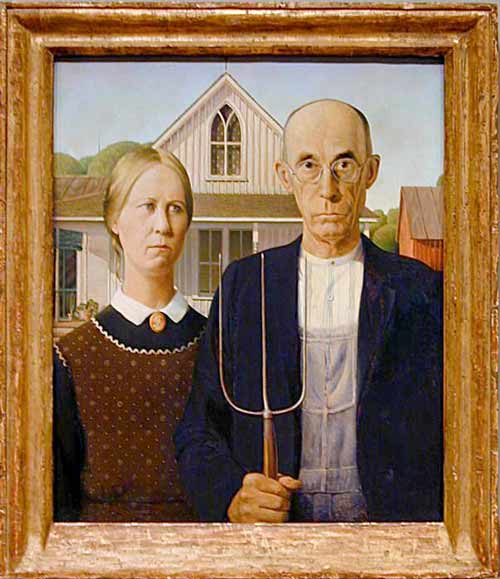
If you want to use the photo of the famous Grant Wood painting "American Gothic," you can click on the one at the right, then opposite click and select "Save as." Put it somewhere where you can actually find it, and name it something clever and memorable like, perhaps, "American Gothic."
|
"But what is this good for?" I hear you asking. Well, some people just like the effect. But this is also good in commercial/business uses for making monochrome vector art.
This tutorial works with PS 5+ AND with PS Elements!
|
| The next part uses a filter that I'll bet you have not used. It is the "High Pass Filter." This filter works by keeping the edge details where distinct color transitions take place while graying the rest of the image. Let's try it.
A2. First duplicate your layer by dragging it to the new layer icon at the bottom of the layers palette. This is in case you really screw up and want to start over. :)
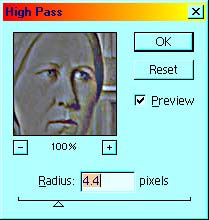
Next, click on Filter -> Other -> High Pass. At the right is the dialog box as it appears. If you want JUST the edges, you can choose a very low radius number, all the way down to 0.1 pixels. I chose 4.4 here.
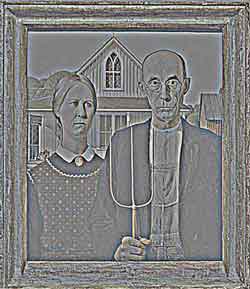
Be sure that "Preview" is checked and then slide the slider up and down to see what it does. Below is my result after this step.
|
|
|
|
| Now we need to adjust away the gray. You could do this with Adjust -> Contrast, but I want you to use Threshold instead. This gives you better control over your result.
A3. So click Image -> Adjust -> Threshold and pull the slider till your result is just the outlines, as in my result below.
Variation: If you want a colored-pencil drawing, use levels at step A3, instead of Threshold.
|
|
|
|
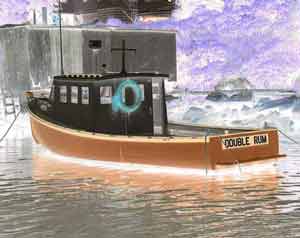
| As i mentioned before, there are many ways to accomplish a similar result. Herewith follows a method which you may want to try. This is a method devised by my friend Dave. I took this picture because of his nickname "OneRum."
B1. Duplicate your layer by dragging it to the new layers icon at the bottom of the layers palette.
Image -> Adjust -> Invert. This gives the somewhat creepy look below.
|
|
|
|
|
B2. Now this next part seems like a trick, but follow along. With the inverted layer selected in the layers palette, you are going to change the layer blending mode of this layer to Color Dodge. You do this by selecting Color Dodge in the dropdown that you get by clicking the arrow at the top of the palette right beside where it now says "Normal." Hey.. why be normal?
Color Dodge increases the contrast of the image underneath by lightening as it intensifies color. (I don't ever exactly remember what each blending mode does; I always have to fiddle with them till I get the right one for the job.
|
|
|
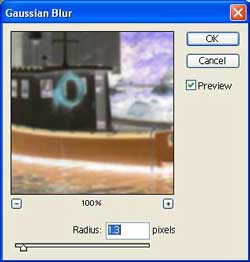
B3. Ok well now that last step just got us a mess, basically. Now comes the magic. With your top layer selected in the layers palette, click Filter -> Blur -> Gaussian Blur. For mine, I used the settings in the dialog box to the right.
|
|
|
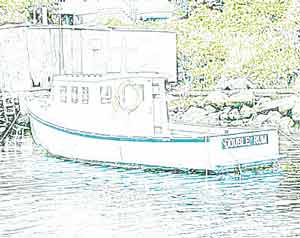
I don't know why this works, but it does, so don't fight me on this. Some things you just have to take on faith. So just do it. :Þ Your result should resemble mine to the right.
|
|
| Next, you will make a layer that is like a snapshot of all you see. I call this a "Merged Visibles Layer." Make a new layer, by clicking the Create a New Layer icon at the bottom of the Layers palette. Drag this to the top of the stack. Ctrl-Alt-Shift-E. |
|
| At this point, you have a rather nice colored pencil-type drawing. But now we will redefine all of these colors, so that they are either black or white. Image > Adjustments > Threshold. |
|
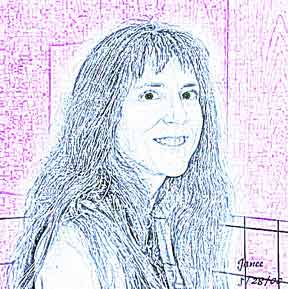
| And here is the result!
|
|
For yet another way to get a line drawing from a photo, you can use the smart blur with "edges only" checked. To see this demonstrated, see my "Pen and Inked Watercolor" tutorial.
Here are some examples of this that students have sent me:
|
|
|
|
| * This was written by Mohamed Al-Dabbagh, a senior graphic designer. He had generously allowed me to include this with my tutorial. (I have done a small amount of gentle editing.)
To complete the benefit of this tutorial, I would like to remind you that this is the first step to convert raster images into monochrome vector artworks. To vectorize artwork (this is often practised in real life business), one may continue this way:
Having converted the photo into line-art using the above tutorial:
1. Convert the picture mode into Grayscale mode.
2. Make the image size grow by resampling the image resolution to 1500 DPI! (Why this big resolution? The answer is to have enough anchor points for the next step.)
3. Using Magic Wand tool, select any BLACK pixel. (Zoom in if necessary to distinguish a black pixel from a white pixel.)
|
4. From Select menu choose Similar.
5. From Paths palette, and while the selection ants are alive, make a working path by clicking the tangents-and-circle icon beneath.
6. From File menu Export -> Paths to Illustrator. The exported file will hold the same PS file name with .ai extension.
7. From Adobe Illustrator, open the artwork file, then Select -> All.
8. From pathfinder filters, choose the filter Exclude.
9. Fill with any paint, and you are done with the vector version of the original photo.
10. You may save the artwork into EPS.
It is interesting to open the same EPS with Photoshop, and see how smooth it is!
--Mohamed Al-Dabbagh, Senior Graphic Designer
|
I hope you have enjoyed this look at ways to make line drawings from photographs. I invite your feedback! Please comment either on the myJanee.com Message Board or you may email me.
Always me,

|
|