 Raindrops Raindrops
While I was making this effect, my husband Michael came in and asked me, alarmed, "How did you get water on your screen?"
Well ok so he *didn't* say that. But wouldn't that have been funny?
The method I describe here is best to use if you have just a few drops to do. It is also good for doing glass effects. (I've heard that there is a plugin called Eye Candy that does water drops for you, but you wouldn't have all this fun if you used that.)
As you work through this tutorial you will do the following:
- Work with the pen tool and the convert point tool.
- Make a path into a selection.
- Use a channel to hold a selection.
- Use some keyboard shortcuts.
- Do some hand airbrush work.
- Use the Stroke command.
- Use the Gaussian blur filter.
- Copy an object.
- Work with layers.
- Change the opacity of a layer.
- Practice "seeing" in a new way.
Outline of process
- Make shapes for drops.
- Make selection.
- White backdrop.
- Black shadow.
- Blue shadow.
- Dark outlines.
- Background.
- White "tree" reflection.
|
I would not call this a "beginners' tutorial," but if you are a beginner and you want to do raindrops, go for it. Just be patient with yourself as you do it, click on the link text for further help, and keep your manual handy.
Though this tutorial was written with PS version 5.5, it will work just great for later versions. I have included directions for later versions where they differ.
Several parts of this tutorial will not work with PS Elements, notably, the channels and the paths. However, if you are working with Elements, you can still get ideas for how to make a drop look "wet," by reading through the ideas in this tutorial.
Items that are underlined as links take you to a more basic explanation of the concept or procedure.
|
| A. Make shapes for drops
1. File -> New and make your canvas white, 500x500 pixels. (size doesn't really matter.)
If you are on version 7, check your pentool options up at the top. Choose the Path option.
Also, for version 7, choose the ADD to path option over toward the right of the pentool options bar.
2. Now, using your Pen Tool (shown with the red overlay at the left), draw triangles on your canvas. You don't actually draw, but instead click your mouse around on the corners of the triangles. Closing your path (finishing one triangle by clicking on the original vertex) will enable you to start a new path with your pen tool for the next drop.
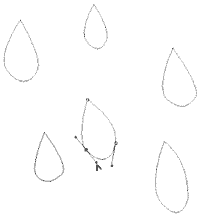
3. Choose the Convert Point tool (purple overlay in the pic at left) and click-drag on your corners that you want to be round.
Think of a name for your file and File -> Save As .. and name it. Leave it in PSD format.
(If you have PS version 6 or 7, you can make a path and then define it as a custom shape if you like. For the quick how-to on this, see step H5 at my Get into Shape tutorial.)
|
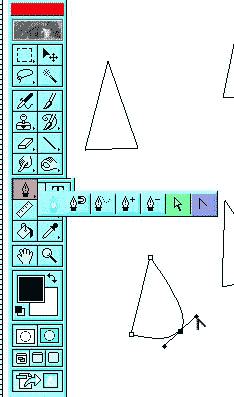
(This is the toolbox from version 5.5.)
|
| If there is a point that you just want to MOVE, hold Ctrl and your pen turns into the Direct Selection Tool (the green overlay in the diagram above) and you can then drag your anchor points where you want them and adjust your adjustment handles as necessary to get the sort of curves that you want.
These are PATHS now, not markings on your canvas or even selections. Next we MAKE them into selections, so that we can work with them.
|
 |
| B. Make selection.
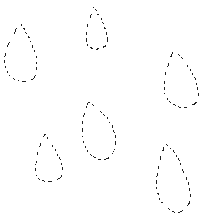
4. Once you have your paths made, you need them to be selections, so you can work with them on a layer. If you have version 7 of Photoshop, you do this, at this point, by clicking the Load Path as Selection button at the bottom of the Paths palette. Bam! Selections! Now go on to step 6.
(Version 5.5 only: When you are finished shaping your drops, click the convert point tool anywhere on the palette to deselect all the paths for the drops.
Now, click on the arrow to the top right on the paths palette, then choose "Make Selection" and make sure that feathering is set to zero. Then click OK and your paths will all turn into a selection before your eyes!)
(In version 6, you can use the "Make Path into Selection" icon at the bottom of the Paths palette. It is a dotted circle.)
5. (version 5.5 or 6) Now that you are done with your paths, turn them off by clicking on the blank area of the paths palette.
Ctrl-S to Save.
|
 |
| 6. After all you have been through to get this selection made, let's hang onto it by saving it as a channel. Click the tab for the channels palette and make a new channel by clicking the new channel icon at the bottom of the palette. (in red at right.) You will be using this channel selection later in step 14.
7. With white your foreground color, alt-backspace to fill the selection with white.
Ctrl-S to Save.
|
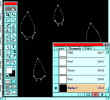
Click if you want to see the New
Channel icon up close. ;)
|
|
We will, in the next steps, recreate one vision of a drop of water. This vision includes a dark shadow, a light shadow (blue) and a white reflection.
|
Learning to see.
Drip some water against a surface. Yes, actually DO it. What is it that you see when you look at it? Don't say "water on a surface." No, look AT the two dimensional view before you. Look at the shapes, the colors, the shadows. What is it about what you see there that tells you that is a drop of water and not a drop of, say, white glue? A drop of water has no color by itself. What gives it the form that we see there is actually a play of light and shadows that our brain interprets as being a drop of water.
|
| C. White Backdrop
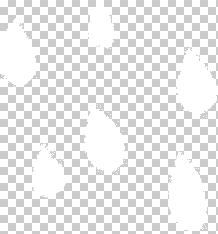
8. We still don't have anything on canvas yet! Let's fix that. Click on the Layers tab to return to that palette. Click the Create a New Layer icon to make a new layer. Double-click the layer and name it White Backdrop.
Type the letter D to make your colors the Default black and white.
Now, on this Backdrop layer, Ctrl-backspace, to fill these selections with white. Ok.. you have white backdrops, but i can tell you don't believe me, so click off the visibility eye for the background layer to prove it to yourself.
|
 |
| Black Shadow Next, make another new layer and, using the same method as above, label it "Black." This is where you will do the black shading. Begin by making my Shading Brush:
I like a rather big soft tip maybe 45 pixels or so for this application.
|
|
|
Making a Shading Brush
This is a brush you'll use a lot. This will show you how to set the parameters the way mine are set for my own shading brush:
- Begin with a soft round brush. If you use a large size to begin with, you won't have to resize it much whenever you use it. I like 200 pixels for this.
- Choose black for your Foreground color in the Color Picker square in the Toolbox.
- Click the Brushes tab and the WORDS "Brush Tip Shape." Set Spacing to 28%.
- Now, in the Options bar at the top, set Opacity to 100%.
- Set Flow in the Options Bar to 28%.
- Turn ON the option for Airbrush in the Options bar.
Now we're ready to save the Shading Brush:
- Click the arrow for the Tool Preset picker.
- Click the New Tool Preset icon at the top right.
- Name your brush. Since you'll be using this often, keep it near the top of your list, by naming it something like "AA Large Shading."
- In that box, tick the Include Color button, so that black will automatically come up for it. (That's optional.)
- Finally, hit the flyout on the Tool Preset Picker box and choose Save Tools. Name your file and you'll have this tool collection saved for eternity!
|
|
|
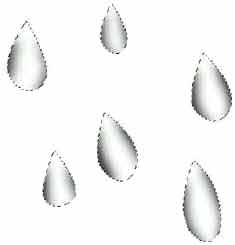
9. Brush the sides of your drops with the black.
Ctrl-S to Save.
|
 |
| D. Blue Shadow
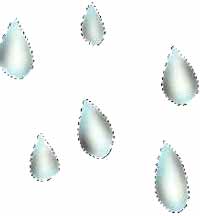
10. Make another new layer and name it "blue". Using the same Shading Brush, brush the top and bottom edges of your drops lightly with a pale blue.
They are starting to look a bit wet already, but we have a few more layers to add to them. We are going to add a background, a dark outline, a white foundation layer (optional), and a reflection layer.
|
 |
| E. Dark outlines
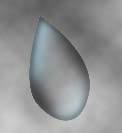
11. Next we'll do the dark outlines on another layer you name "dark outlines". Here's how: Choose black in your color picker and while you have the drops selected, Edit -> Stroke. Choose "center" and a pixel width of 1.
Ctrl-D to deselect.
Ctrl-S to Save.
|
 |
| F. Background
12. You need to have a surface to put behind your raindrops on your canvas. Open whatever file it is that you want, make sure it is in RGB mode like your drops, then drag it to your raindrop canvas. In the layers palette drag that layer down to the bottom. Label it "Background".
You will probably need to adjust the opacity of your Backdrop layer at this point. Do this using the Opacity slider at the top of the Layers palette.
For mine, I made a new layer above my background and did Filter -> Render -> Clouds.
Ctrl-S to Save.
|
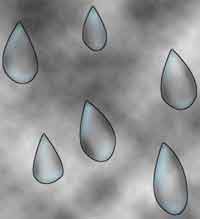 |
| 13. Now you can readily see that the dark outlines that we made are TOO dark, so soften them a little. Select the "dark outlines" layer and then Filter -> Blur -> Gaussian Blur with a setting of about 3.
14. Trim the blur off the outside edges of these lines as follows: Click the channels tab and Ctrl-click the alpha channel. With the "dark outlines" layer selected in your layers palette, Select -> Inverse and hit the Delete key. Ctrl-D to Deselect.
Ctrl-S to Save.
|
 |
| G. Tree reflections
17. I rather like the effect of the "tree reflection". What you do for this is take a small soft brush, zoom in closely, and, on a new layer labeled "trees", draw some little broken white lines on one of the raindrops.
18. Now we will copy the reflection onto the other drops. Type L to grab the Lasso tool and draw a selection loosely around the reflection. Type V for the MoVe tool and then hold Alt and drag copies of the reflection onto the other raindrops. (What happens if you hold Shift-Alt and use the move tool? What about just Shift? Try it!)
|
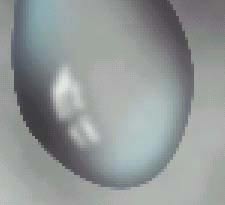 |
| 19. You don't want the tree reflections to be TOO crisp, so apply a tiny bit of a Gaussian blur to them. You still want to see that the lines are broken. You don't want a very blurred indistinct reflection here.
Ctrl-S to Save.
|
 |
|
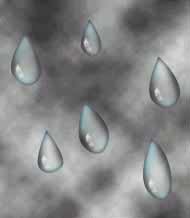
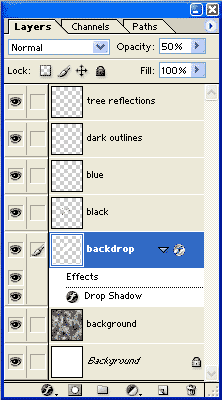
20. If the drops are ON the background surface, you can add a dropshadow if you like. You can make this using the white backdrop layer. You may need to readjust your opacity of this layer.
21. Depending on what sort of backdrop you have, you will need to adjust the opacity of all of the layers, the black, the blue, the outlines, and the white. Here's what my Layers palette looks like at this point. >
Ctrl-S to Save.
|
 |
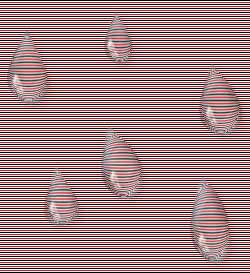
| In this example, I used the spherize filter to distort the background behind the drops making a sort of "glass bead" effect! (Ctrl-click the Alpha channel where you saved your selection. Then choose the background layer in your layers palette and Filter > Distort > Spherize.)
What can YOU do with yours?
Ctrl-S to Save. Keep your psd file in case you want to fiddle more with this another time. If you want to save this as a jpeg, use File > Save a Copy (or File > Save as.. or Save for Web), then name it.
|
 |
| Student work:
|
I hope you enjoyed this tutorial!

|