 Make a Rule-of-Thirds Action Make a Rule-of-Thirds Action
One of the standard rules of photo composition is the Rule of Thirds. While it can be debated if it is really a "rule," whether it is out-dated, or just a rule that's made to be broken, it is still considered by most photographers to be a guideline for making a pleasing photo composition.
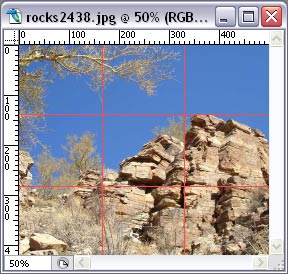
With this Action, you can create Guidelines on an image to help you to see how well your image fits with this rule.
|
 |
A. Get Started
1. Open any image file.
|
 |
|
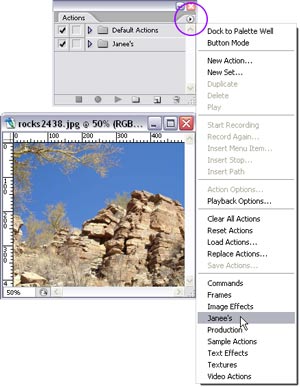
2. In the Actions palette, click the flyout at the top right, and choose the Library in which you want your new Action to go. I chose Janee's.
|
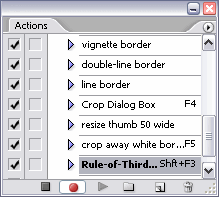
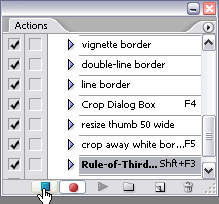
3. Click the Create a New Action button  at the bottom of the Actions palette. Name your Action Rule-of-Thirds Guides, or something equally clever, and assign your Action to a Function Key. I am using Shift-F3. at the bottom of the Actions palette. Name your Action Rule-of-Thirds Guides, or something equally clever, and assign your Action to a Function Key. I am using Shift-F3.
Then click the Record button in this dialog box.
In your Actions Palette, you'll now see a red light for Record. This means that you're live. Whatever you do in PS will now be recorded as part of this Action.
|
 |
B. The Action
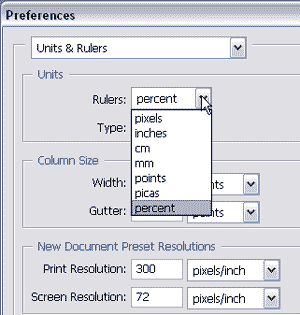
We want the Guidelines to be in the proper position, not just for this image, but for ANY image. Therefore, the positioning of the Guidelines must be by percentage, not by pixels, inches, or other units. So the first thing you will need to do is to change your units to Percentage.
1. Edit > Preferences > Units & Rulers. Under Units, first make a mental note of what this reads now. Then change the Units to Percent. Click OK.
|
 |
|
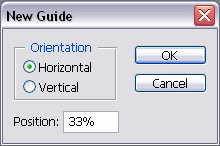
2. View > New Guide. Choose Horizontal, and type 33 into the blank. OK.
You'll see this Guideline on your image.
3. View > New Guide. Choose Horizontal, and type 67 into the blank. OK.
4. View > New Guide. Choose Vertical, and type 33 into the blank. OK.
5. View > New Guide. Choose Vertical, and type 67 into the blank. OK.
Now we have our Guidelines. Let's change that Preference back for our Units:
6. Edit > Preferences > Units & Rulers. Under Units, change this back to whatever units you began with.
|
 |
C. Stop the Action
Click the Stop Recording button at the bottom of the Layers palette. You're no longer recording. You can talk now.
Now to test your Action!
|
 |
D. Test the Action
Be sure that your F-lock is on, if your keyboard has such a key. This enables your Function Keys to actually work. (I don't know why Logitech makes the F keys optional. Whenever I reboot, I have to remember to turn F-Lock back on, or I wonder why things are not working. Most vexing!)
1. Open an image.
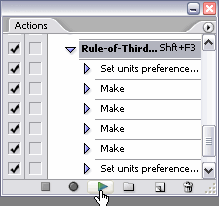
2. If you've assigned a Function Key to your Action, click it! If you didn't, then go to the Actions palette, find your Action, and hit the Play Action button at the bottom of that palette. It is a right-facing arrow.
And watch Photoshop do its work! If it doesn't work right, go through and check to be sure that you followed all the steps. You can fix a step in the Action if you need to. Drag to the trash the one that's wrong, click Record, and then do the step properly.
|
| Tip: To get rid of the Guides, you can either use View > Clear Guides, or you can toggle them off and on with Ctrl-; . |
|
| Note: If you want your Guidelines to be another color, this can be accomplished in Edit > Preferences > Guides , Grid, & Slices. |
|
|
|
|
Ask tutorial questions in the myJanee.community:

|
All material in this site is ©2001-2006 by myJanee.com Graphic Creations. No part of it may be used without my written permission. If you have questions or comments about this site or its construction, contact Janee at myJanee.com Graphic Creations by email.
|
|
|
|
|