 Creating Custom Shapes: Part 2 Creating Custom Shapes: Part 2
|
 |
See my ALL NEW Custom Shapes Tutorial! If you are wanting to learn to make graphics in Photoshop, this is an important tutorial for you. If you are just wanting to have some fun manipulating shapes, well, then this tutorial is mandatory! As we work through this tutorial, we will learn or practice the following:
- Problem-solving
- Using the Shape Tools
- Duplicating a path
- Combining paths
- Making a path into a Custom Shape
- Using a Custom Shape
|
This tutorial will work with versions 6+ in Photoshop. Most of it will not work with Photoshop Elements 2, because you do not have the path options available in Elements. This tutorial is written with beginners in mind, but I think that most people can find something to learn here. I know that I learned new things as I wrote this!
|
| In this tutorial, we'll combine paths to make a new path. Then we'll make this new path into a Custom Shape.
First, think of a shape that you want to make. I'll make this part easy for you, by thinking of a shape. To begin, let's make that orange thoracic part of the moth to the right.
What is this shape? Without looking too far ahead in this tutorial, decide what you think comprises this shape.
Once you think you know, hover over the moth for one possible answer.
|
|
|
| So we will create an elliptical path and then intersect it with a second identical elliptical path:
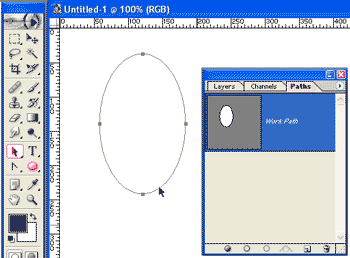
1. Choose the Elliptical Shape tool. Then choose the Paths option in the Options Bar. Check that the Add to Path Area button is clicked.
Why? Well.. we want just a path. The other choices, Shape Layer and Fill Pixels will give you a filled path. That will just be unnecessarily confusing. We want JUST a path.
|
 |
What's a Path, anyway?
A path is not a picture. It is not really even an actual thing. It is just a mathematical description of a thing, rather like comparing a blueprint to a house. Using a house blueprint, we can build the house in whatever scale we like, using varying materials, or build it in different locations.
The same is true of a path. It isn't a real object yet, just a description of it. Once we have created this path, we can choose to size it as we want, reshape it, and then, perhaps, to fill it with a color, or stroke its outline with a brush.
|
| 2. Drag out an elliptical path across your canvas. You see it as a thin line, but remember that it is just an idea, not an actual line. |
|
Click your Paths tab and you will see the path as a white filled region. This just shows you what would be filled, if you were to fill it.
|
Path thumbnail too small?
If you can't see the Path well enough in the Paths palette, you can make it bigger. Click the arrow to the top right on that palette, just below the red x. Choose Palette Options, and make your thumbnail larger!
|
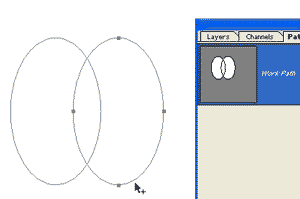
| 3. Now to duplicate this path, choose the black Path Selection Arrow. It is above the Pen Tool and might be hiding under the white arrow. Hold the Alt key. Notice that little + sign that appears beside the arrow? That tells you you are making another path.
Hold Shift to keep your drag in a straight horizontal, and drag this new ellipse over so that it intersects with the first, as i have done to the right.
Looking at the path in the Paths palette, we don't have that little moth body, though! We have a whole big ellipse-marriage. We want just the intersection.
|
 |
| 4. With that 2nd ellipse still selected (see the black anchor points), click the Intersect Path Areas option button.
Now, in the Paths palette, that moth body should be all that's white!
|
 |
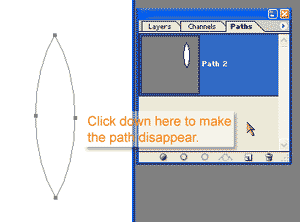
| 5. With the black arrow still in your hand, click the Combine button in the Options bar. This gets rid of all but that intersection!
Click in the empty space below the path to make the path disappear. See? It isn't real!
Click the path in the Paths palette again to make it reappear. Now let's make it into a Custom Shape.
|
 |
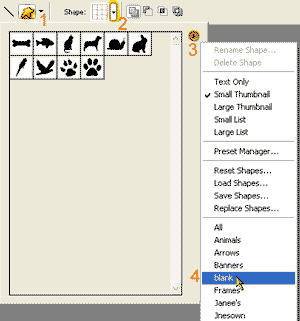
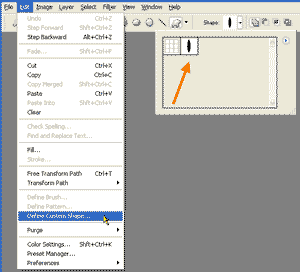
| 6. Go to the Shapes Libraries by following my handy numbering to the right. Choose a library to which you would like to add this lovely moth body. I've chosen my "Blank" library, because I want to start a new library just for moth body parts.
If you want to start a new library for your own shapes, see Making your Own Shape Library.
|
 |
| 7. Edit > Create Custom Shape. Et voilà! There it is, at the bottom of your current Shape Library! |
 |
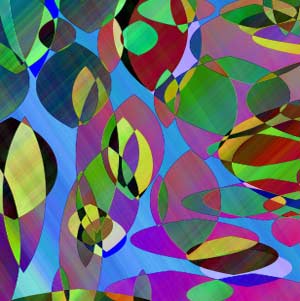
| Now... anytime i want a moth body... it's right at my fingertips! |
 |
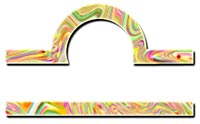
| As an exercise, figure out how you would combine shapes to make the path for this:
Hint: Begin by ADDING shapes.. then subtract as necessary. Hover over the symbol for another hint.
|
 |
| Student work:
|
|
For more on Shapes in Photoshop, see these tutorials:
 Basic Shapes Basic Shapes
 Pearly Button Pearly Button
 Show me a Sign! Show me a Sign!
 What's the Vector, Victor? What's the Vector, Victor?
(examining vector vs. raster graphics)
 Using and Creating Custom Shapes Using and Creating Custom Shapes
For more on resizing vector paths for logos, see this tutorial:
 Love Your Pen: Enlarging Logos Love Your Pen: Enlarging Logos
|
I hope you enjoyed getting into Shape with me in this tutorial!
Always me,

|