 Taters: Photo Retouching 2 Taters: Photo Retouching 2
A Method to Correct a Color Cast, and Tips for Using the Patch and Healing Brush Tool
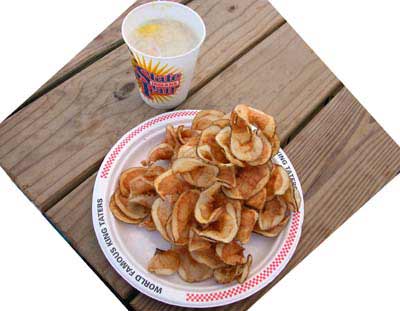
Ok, ok.. so my editor (for Trade Secrets) told me that no one takes pictures of their food, so this section was cut from that book. Well.. I still think that it is an interesting snapshot.
Besides the fact that it illustrates some common photo problems, this photo depicts a bit of Americana. These potatoes are sliced in one continuous thin spiral slice and then fried in deep fat fryers. This was a once-a-year treat for me at the Indiana State Fair.
Here we will look at a couple of ways to fix a picture with Photoshop. Your photos will, of course, have their own problems, but the ones that we encounter here with "Taters," might offer you some tips in facing yours. In this photo, we will try to diagnose and fix that color cast. Also, we will clean those grease spots off the table.
We can tell that the photo is a bit dull, and it might seem to have a blue cast to it. But might there be some red there? Or green?
|
For this tutorial, we will use these:
- Threshold
- Eye dropper
- Blending modes
- Patch tool
- Healing brush tool
- Clone stamp tool
|
|
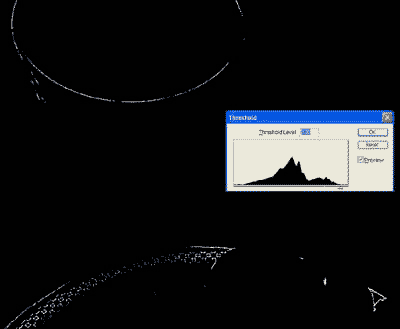
I will use my favorite way to discern a color cast, using the Color Picker. Then we'll go through a procedure which uses this color to make a color correction layer. We begin by finding one of the lighter areas of the image. You can ascertain for certain which area is the lightest with a threshold adjustment layer:
1. Click on the Add New Adjustment Layer icon at the bottom of the Layers palette. Choose Threshold.
2. Move the slider to the right till there is just a bit of white showing. These are the lightest areas of your image! (What happens when you move it to the left?)
|
 |
- Turn off the eye for this adjustment layer (or throw it away.)
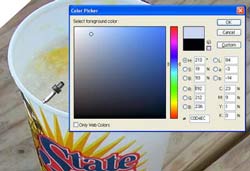
- Click the Foreground Color Picker in the toolbar.
- Bring the cursor over to one of the very light spots on your image and tap the eyedropper on one spot.
Now we can see from looking at the color picker dialog box that we are dealing with a shade of BLUE. It is a bit toward cyan, but it is really blue. Now let’s make our color correction layer.
- Click the Create a New Layer icon at the bottom of the Layers palette.
- Alt-Backspace to fill this with the light blue. You will, at this point, not be able to see your image, but it is on a separate layer beneath this correction layer.
- Image -> Adjustments -> Invert. Light goes to dark, and the color tone shifts to the other side of the color wheel.
|
 |
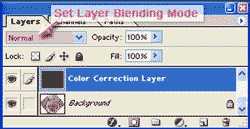
| Now, to blend it with the Taters image, click on the Blending Mode in the Layers palette.
Then use the arrow keys to run down through the blending modes. Check out the various results from this. Depending upon your image, you may choose a different one, but for Taters, I chose Color Dodge.
|
 |
|
This Color Correction Layer method may seem algorithmic and mechanical at first, and it is certainly one that could be made into an action, but it is also flexible. By adding a layer mask to the Color Correction layer, and coloring black on it, you can do localized color correction, that is, you can add back the blue cast if you want it on part of the image.
|
 |
|
Patching and Healing
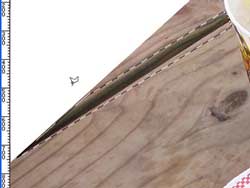
I am not happy with the crack between the boards at the top left. I just find it jarring to the geometry of the rest of the photo. So let’s take it out! Because this is wood, a relatively homogeneous texture, in which irregularities are to be embraced, the Patch tool is a good choice. The edges of the crack abut an area where there is contrasting color at the cup, so we may run into difficulty here, but we can work with that later.
- For the Patch tool, as with the Healing tool, we need to work on the layer itself, so drag it to the Create a New Layer icon at the bottom of the Layers palette before you begin this. This duplicates your layer, keeping the original untouched, whilst giving you a working layer. With the bottom of these two layers clicked in the Layers palette, click the little padlock at the top of the palette to lock the original layer. This will prevent any accidental tampering.
- We can make the selection with the Patch tool, but, since there are straight edges here, use the polygonal lasso instead.
|
 |
- After you have made the selection, choose the Patch tool. In its Options bar, click on the radio button for Source, because that is what you are about to identify.
|
 |
- Move your selection, using the Patch tool (which turns into the Patch move tool,) over to where you want to obtain your patch.
|
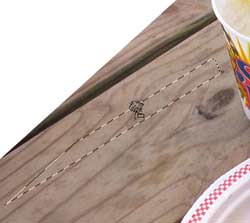 |
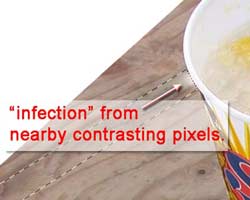
- Snap! The patch copies itself up to cover that crack. However, because of that adjoining white cup, we have infection into the patch. We will fix that with the clone tool.
|
 |
|
The infected area can be fixed with the Clone tool. But will we be doing a Use All Layers clone? Or can we clone onto a separate layer?
"Use All Layers" means that PS looks at everything there, so what happens if we try Use All Layers cloning for this?
Under what circumstances would Use All Layers cloning work?
You should have concluded that Use All Layers will only work if you clone onto a new layer and if that layer is above the Color Correction layer. This will make it so that any subsequent color tweaking you do will NOT affect your clone layer, so you need to be quite sure that you are finished color-tweaking before you do this sort of cloning.
|
- So when you have Adjustment layers in place, it is generally a good idea to use Working Layer cloning. Here's how:
- Duplicate the working layer by dragging it to the Create New Layer icon at the bottom of the Layers palette. Click on the bottom of these working layers and click the lock in the layers palette to keep this layer untouched.
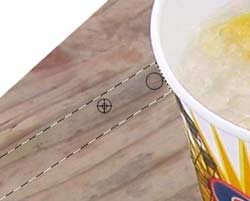
- Leave the selection going to keep your clone work within that boundary. Type S to choose the Clone Stamp tool, and use a soft brush.
- Hold the Alt key to sample an area nearby and then paint with your Clone tool right up to the edge. Ctrl-D to deselect.
|
 |
Cleaning up the grease.
Let's use the Healing Brush tool to get rid of those grease spots!
|
|
| Alt-click a source that is similar in texture to where you are in need of healing. Then paint in the healing! Fix as needed with the Clone Stamp. |
|
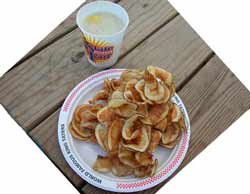 Before
|
I hope you enjoyed this tutorial!
|
|
|
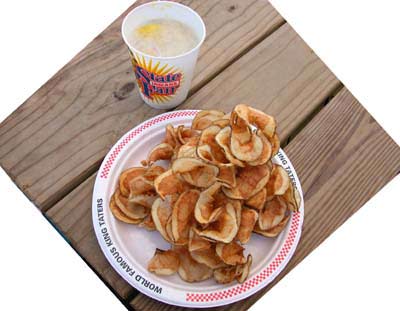
After |
|
|
RETURN to Janee's Archive Tutorial Index
email me!
Ask tutorial questions in the Message Board:

|
|
|
| All material in this site is ©2001-2003 by myJanee.com Graphic Creations. No part of it may be used without my written permission. If you have questions or comments about this site or its construction, contact Janee at myJanee.com Graphic Creations by email. |
|
|
|
|