|
|
Making a "Crayon Drawing" in Photoshop
|
 |
|
|
In this tutorial, we'll make a crayon drawing in Photoshop! Skills you will learn/practice along the way include these:
- Making a Pattern Adjustment layer (and why you would want to)
- Using Layer Blending modes
- Changing brush settings
- Loading textures
|
This tutorial is written with the beginner in mind
Although this tut was written for the use of PS 7+, and its screenshots are from version 7, it will work for PS Elements, as well.
|
|
What we will do here is to make a textured background, like the paper or canvas we would be drawing on with the crayon. Then we will make our "crayon" and draw with it. Here we go!
1. Make the Canvas.
Make a new layer, by clicking the Create a New Layer icon at the bottom of the Layers palette.
This next step is cool, because it will save time.. and at the same time, gives you a fun option.
Begin by filling the background layer with a texture. This texture came from Edit -> Fill -> Pattern.. and then choosing the "Wax Crayon on Charcoal Paper" texture. It comes in the Artist Surfaces Library with PS 7+. (Click the drop-down arrow for Contents, then on ITS dropdown arrow to the top right, choose Artist Surfaces.)
|
To get the nice color tone to the background, put a layer under the textured one. Fill this with a light color, like this very light green I used. (#DBF9EF).
Next, for the textured layer, choose a Layer Blending Mode of Soft Light. (Experiment with these; you can get some very cool effects! You can get different, though still cool, effects by putting the colored layer on top.)
|
|
|
2. Make the "Crayon."
For the crayon, you'll be using the Brush Options palette to outline the specifications for your brush. The goal here, of course, is to make a stroke which looks like a crayon stroke on your canvas.
Click the tab for your Brushes palette. If you don't see it, use Window > Brushes and there it'll be!
The first option to choose is the Texture. Click the checkbox for Texture, and then click the word Texture, to show you these options.
Click the dropdown for the texture at the top, and find the same Library and Texture that you used for your canvas above. Click the Invert box.
|
 |
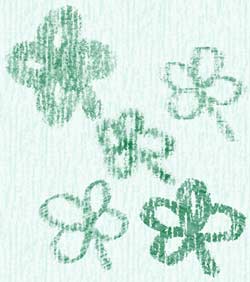
| Now you need to choose the Brush Tip Shape which gives you the best crayon-like mark. I did some trial-and-error here, with lots of error. I chose the odd "Sampled Tip 38," which looks something like a flower. Hey.. experiment till you find a tip you like better!
I used a spacing of 17%, and Opacity and Flow, set in the Options Bar, of 100%.
|
 |
|
|
I hope you enjoyed this tutorial!

|
Different brushes give different strokes! |
|
|
RETURN to Janee's Archive Tutorial Index
Ask tutorial questions in the myJanee.community:

|
All material in this site is ©2001-2006 by myJanee.com Graphic Creations. No part of it may be used without my written permission. If you have questions or comments about this site or its construction, contact Janee at myJanee.com Graphic Creations by email.
|
|