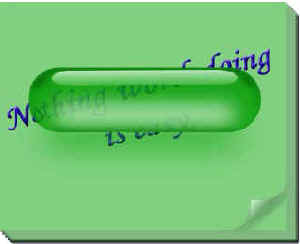
Capsule
Tutorial
Capsule
Tutorial
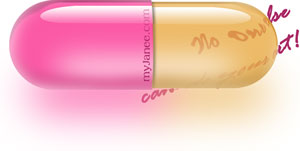
Click HERE to go to my all NEW Transparent Capsule Tutorial!
I would not classify this tutorial as a "beginner's tutorial," but if you are a beginner and think the project looks cool, I encourage you to go on and do it! Just take your time and read each instruction through a couple of times.
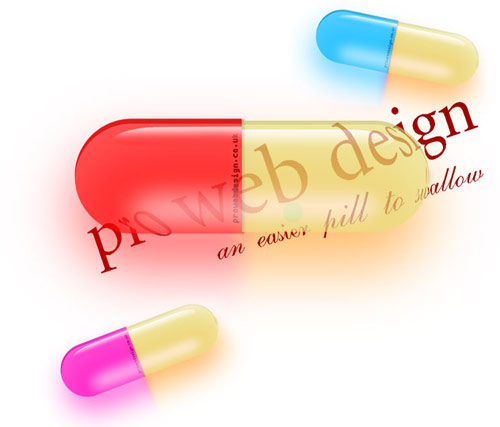
The capsule has really 5 different components which are each critical to the outcome of this project. I mean, if you leave something out or do it radically differently from mine, your result will look different. The 6 components are
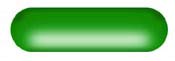
- The main base capsule shape
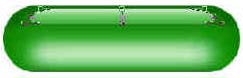
- The lower blurred white highlight
- The upper sharp highlight
- The darker shading around the edge of the capsule and at the top corners
- The glow, or colored shadow, under the capsule
- The distortion through the capsule
|
This tutorial was originally written for Photoshop version 5.5, but there is little difference for later versions. Specific instructions for version 6-8 appear in (parentheses) and in purple.
As you work through this tutorial you will gain experience with the following concepts:
- Making simple shapes
- Using alpha channels to save selections.
- Manipulating selections
- Using the gradient tool
- Using filters
- Using multiple layers to achieve effects
- Using opacity settings
|
| 1. Make the capsule shape.
a. Open a new file. First we will make guidelines:
- Click on the tab for the Channels palette. Create a new Alpha channel by clicking the new channel icon at the bottom of the palette next to the trash can.
- From your rulers at the top and the left side, drag out two horizontal lines and two vertical guidelines to mark the borders of the capsule.
|
Tip:
No rulers? In the menu bar, View -> Rulers. Whilst you are there, make sure that Snap to.. Guides is checked.
|
|
b. Now to make the end circles:
- Choose the Elliptical Marquis tool.
- Hold the Shift key, and starting at the upper left guideline intersection, drag your mouse to make a circle that is tangent to these three guidelines.
- Alt-backspace to fill it with white.
- Using Ctrl-Alt-Shift and the Move tool, copy the circle and drag it over so that it is tangent to the three guidelines at the right side.
|
 |
c. Now to finish the capsule shape:
- Choose the Rectangular Marquee tool.
- Starting at the upper point of tangency of the leftmost circle, drag the rectangular marquee across the capsule. It will snap to the other point of tangency if you get it pretty close.
- Alt-backspace to fill with white.
- Ctrl-d to deselect.
- Now, Ctrl-click on this Alpha channel in the Channels palette, to load this white area as a selection.
|
Making the capsule shape in Version 6 - 8:
You can do it this way, or you can use the rounded rectangle tool which is below the Type tool in the toolbar in the "rectangle tool" flyout.
- A nice way to do this is to let PS's Shape Options bar do this for you:
- Use "Fixed Size" in the shape options, and make the width about 3 times the height.
- Make the radius half the height.
- Choose the "create filled region" choice in the options bar.
- Choose a foreground color, (white, if you are putting it into the Alpha channel here)
- Finally, click where you want the upper left corner of the capsule to be. Abracadabra.. aleckazam!
|
d. Next we will make a layer and color the capsule!
- Click the Layers tab to go to the layers palette and click the Create a New Layer icon to open a new layer.
- Double-click the name of the layer in the Layers palette, and name it "capsule".
Hint: Actually do name the layer. You will end up with several layers and you will easily get confused if you don't label them.
- Choose a color in your color picker.
- Alt-backspace to fill the selected capsule shape with your desired color.
- File -> Save As .. and think of a name for your file.
|
What's an Alpha Channel, anyway?
An Alpha Channel is just a fancy name for “let’s make a selection and save it here”. The selected part is in white and the unselected part is in black.
There are some cool things about selecting in this way. First, you can also save PART of the opacity of a pixel, by making it GRAY. Also, you can use filters and distortions on channels, just as you can on layers. Adding to the selection or taking away, is just as easy as painting on a layer. Too, if you save your file in psd format, any channels will also be saved, so when you open your file again, the selection will still be there in the form of the Alpha channel.
|
| 2. Make the lower highlight.
In this step, we take the selection of the capsule shape and shrink it down to form the highlight at the bottom of the capsule. Look ahead to see what it will look like. We will use channels to "store" the selection because we will need it again!
a. Make the shape for the lower highlight:
- You should have the marching ants going around the capsule at this point. If you don't, you need to reselect the capsule. Do this by Select -> Reselect or Ctrl-click the capsule layer in the layers palette.
- Select -> Modify -> Contract and contract the selection till the selection is about 1/3 the height of the capsule.
- (Notice that the new selection isn't as smooth as the original capsule. This is one of the hazards of modifying a selection this way. You can also modify a selection using Select -> Transform Selection to give a smoother selection.)
- Open a new layer (Label it "lower highlight") and then fill this selection with white.
b. Next, we'll save the highlight shape as an Alpha channel:
- While you still have this smaller area selected, click on the tab for the Channels palette.
- Click the little icon next to the trash can to bring up a second Alpha channel with the marching ants delineating the smaller selection.
- Alt-backspace to fill this with white on the new channel.
- Ctrl-D to deselect. You now have two Alpha channels, one holding your capsule selection and the other holding the smaller highlight selection.
|
 |
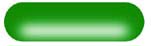
c. Finish the highlight:
- Return to the Layers palette.
- Filter -> Blur -> Gaussian blur on your "lower highlight" layer till you have a nicely blurred highlight. (I used 13 pixels.)
- Type the letter v to bring up the move tool. Then pull the highlight down to the lower third of the capsule.
|
 |
| 3. Make the darker colored
area around the top edge.
a. Now we will make a darker colored capsule layer. From this, we'll "carve" out the inside and make that darker border:
- Go back to the Channels Palette.
- Ctrl-click the Alpha 1 channel to reload the capsule selection.
- Open the Layers palette and make a new layer.
- Name it "darker color".
- Click on your color picker and choose a color that is essentially the same as the capsule color, just deeper.
- Alt-backspace to fill the capsule shape with that.
b. Now you are going to "carve" the proper shape for the darker color rim. To do this, you are going to make a sort of "eraser" to select an area, then the Delete key to "erase" it. Here's how:
- In the Channels palette, Ctrl-click on Alpha 2. This loads that smaller selection.
- Then choose any one of the selection tools. Click inside the part that is already selected and you can move the selection around.
- Move the selection to where you want the deeper color erased.
- Hit the Delete key.
- Do this till the darker area is the way you like it.
(Yes I know that there are easier ways to do this, but I am showing you one way to use a selection. Your goal here is facility with Photoshop, not just making a silly capsule!).
|
 |
|
c. Finish the darker color layer:
- With the darker color layer selected, do Filter -> blur -> motion blur. (I used 16 pixels and a horizontal blur.)
- Then do a bit of a Gaussian blur too, till it is blended nicely with the capsule layer. Zoom in if you want.
- Ctrl-click on Alpha 1 to reload that selection.
- Select -> Inverse and hit the Delete key, to trim off the excess blurriness.
- Ctrl-d to deselect.
Aren't alpha channels handy?
|
 |
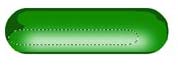
| 4. Make the sharp upper highlight.
a. Shape the upper highlight:
- Return to the Channels palette.
- Ctrl-click on Alpha 2 to reload the selection.
- Return to the layers palette and open a new layer.
- Name the new layer "top highlight".
- Choose the Gradient tool and the linear gradient option in the options bar.
- In your color picker, choose the original green for the background color and white for the foreground.
- As you drag your gradient, hold the Shift key to keep the gradient perfectly vertical.
- Drag the gradient from the bottom to the top, inside the selection.
Raise your hand if you have learned anything new in this tutorial so far.
b. Next, we'll finish the upper highlight:
- Move this to very close to the top edge, as shown at left.
- Then Edit -> Transform -> Distort and pull the corners till the transformation box is trapezoidal in shape as shown.
- Ctrl-D to deselect.
|
 |
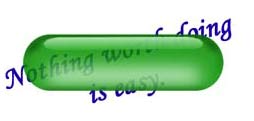
| 5. Opacity changes.
a. Put some text or a pattern or something on a layer behind the capsule so that you can see to adjust the opacity.
b. Adjust the opacity for each layer at the top of the Layers palette. Work on opacity on the capsule and the lower highlight first, till they satisfy you. The opacity on the upper highlight should remain pretty close to 100% or it won't look right. One of the beauties of layers is that you can adjust opacity separately for each layer.
Ctrl-s to Save.
|
 |
| 6. Make the colored
shadow of the capsule.
a. Make the shape:
- Ctrl-click Alpha 2 again.
- Open a new layer.
- Drag this layer below the capsule layer in the Layers palette.
- Name the new layer "shadow".
- Fill the selection with the same color in which you did your original capsule.
b. Finish the colored shadow:
- Move this shadow down below the capsule and deselect.
- Gaussian blur this till you are satisfied with the way it looks.
- Adjust the opacity of the shadow till you are satisfied with the effect on the text.
|
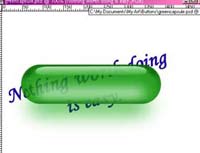 |
| 7. Distort the text to make
it look "magnified".
a. Reload the selection from Alpha 1 and then return to the layers palette and select the text layer.
b. Filter -> distort -> spherize till you are satisfied with the results. Deselect.
Ctrl-S to Save.
I hope you enjoyed this tutorial!
For more of my Archive tutorials, check out my Archive Tutorial Index.

|
|
| Student work: Click to enlarge
|