|
Crumpled Paper in Photoshop
|
|
If it is old, we want it to look new. If it's new.. we want it to look old! Crumpling paper is a neat effect to use for website graphics and scrapbooking.
A. Get started
Make a new file, a bit larger than you want your finished paper to be. For this tutorial, size doesn't matter. Make your file RGB mode and have white for your background.
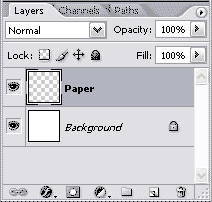
Make a new layer. You can do this by clicking the Create a New Layer icon at the bottom of the Layers palette, or use Ctrl-Alt-Shift-N. Double-click the layer's name and rename it something that makes sense.
|
|
B. Set up your Gradient Options
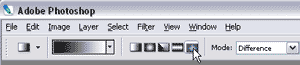
Choose your Gradient tool  . .
In the Options Bar, change the Mode to Difference. This is important.
And it's also important to remember that you changed the Mode. If you leave your tool in Difference Mode, you will wonder later what in the world happened to it.
From the Gradient tool's Shape Options, choose something other than Angle and Radial. I like Diamond or Reflected.
Choose black and white for your Foreground/Background colors. You can type D and PS will set them for you (Defaults!)
|
|
C. Go a little wild
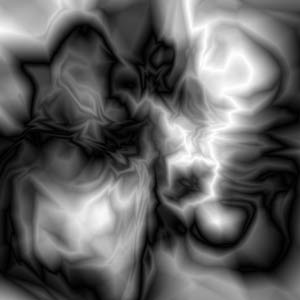
Drag your gradient across your canvas over and over, going in different directions each time, and starting from different points.
Your canvas will get crazy and cool. The more wild it gets, the more crumpled your paper will be in the end.
This is the result of probably 30 drags with the Diamond Gradient. This is actually.. overkill, I think. >
This is cool, to be sure, but it surely does not look like folded paper!
|
|
D. Fold the paper
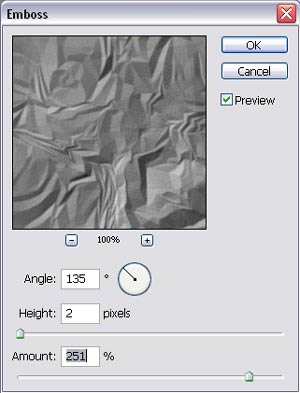
Filter > Stylize > Emboss. Choose the angle for where your light will be coming from. I like 135°.
Choose a Height and an Amount that give you good results. I like about 2-4 pixels for Height and an Amount of 200-300%.
E. Use Levels or Curves
... to bring your paper to the tonality range that you want. And you can color your paper with Hue/Saturation. You can get to these under Image > Adjustments ...
|
|
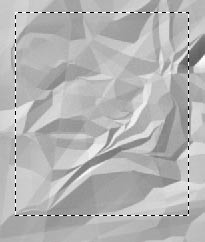
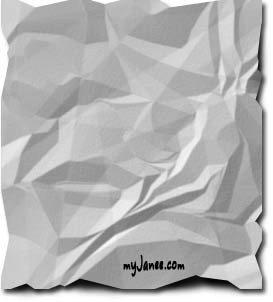
F. Cut out the paper
Now we'll cut out the paper. You're going to be making a selection of the part of the paper you're going to keep, in order to get rid of the borders. If you want the borders, then you're done! Go off and reflect upon how cool this is.
For your selection of the paper you want to keep, you will want to have a somewhat irregular border, but not too strange.
Crumple a piece of real paper and look at its border. You can tell that it used to be a rectangle. That is, you still have mostly straight edges. But you have indentations where the crumples are most pronounced.
|
|
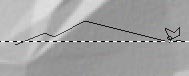
Use your Rectangular Marqee tool  to begin your selection. to begin your selection.
Then hold the Alt key to subtract from your selection. Using the Polygonal Lasso tool  , carve out some crumples from your edges. , carve out some crumples from your edges.
|
|
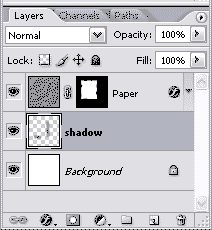
After you get your selection made, click the Add Layer Mask button at the bottom of the Layers palette  . This will add a Layer Mask leaving the selected part visible and the unselected part hidden. . This will add a Layer Mask leaving the selected part visible and the unselected part hidden. |
|
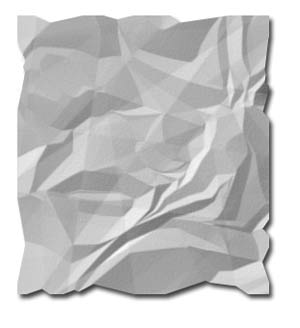
G. Complete the illusion
You'll need to have some sort of shadow under the paper. I'll shade mine as if it were lying on this pristine white surface. A drop shadow can begin your shading, but you'll need to paint more shading in where the paper is higher around the edge.
Make your Drop Shadow by clicking the little  at the bottom of the Layers palette. Click the WORDS Drop Shadow to adjust its parameters. at the bottom of the Layers palette. Click the WORDS Drop Shadow to adjust its parameters.
With your top layer still active, Ctrl-click the Create a New Layer icon to make a new layer beneath this one. Label it Shadow.
Use my AA Shading Brush v with black to paint shadows in under the peaks of your crinkled paper edges.
|
|
|
AA Shading Brush
For shading, I like a large, soft brush, with opacity set to 100% and flow set to about 30%. Spacing (in the Brush Options tab, click Brush Tip Shape) should be about 30%.
These settings will give you a nice shading brush, for easy-to-control, soft and gradual transitions. If you find that you like this brush, make a Shading Brush preset:
- Set up your brush, just as you like it.
- In the Tool Preset dropdown, press the New Preset button.
- Check Include Color if you want your shading brush to be black by default.
- Name the brush AA Shading. The AA will keep your frequently-used brush presets at the top of the stack!
|
|
|
|
|
|
I hope you enjoyed this tutorial!

|
|