|
Over the Edge:
Creating Unique Photo Edges in Photoshop
|
 |
|
|
Why settle for the plain rectangular edges that you usually get on your photos? With Photoshop, you can get creative.
We'll get you started here, by showing you the basic how-to, and three examples of cool photo edges.
As you work through this tutorial, you'll learn or practice the following:
- Making a Layer Mask
- Using the Crop Tool
- Working with layers
- Using filters and filter options
|
Let's get going!
|
| This tutorial is written with beginners in mind. It will work just fine with Photoshop in any version above v.5. I wrote it using PS CS, so the screenshots are from that program. If you're using another version, your screen will look a bit different from mine, but you'll get the same results. |
|
If you're looking for a framed appearance for your photo, I have written two tutorials on making frames. You can find them here:
 Building a Bulletin Board: Making the Frame Building a Bulletin Board: Making the Frame
 Framing a Picture with a Mitred Frame Framing a Picture with a Mitred Frame
|
|
|
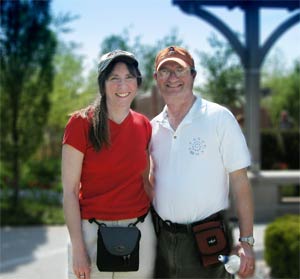
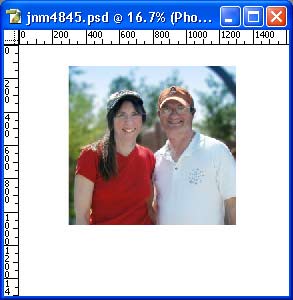
1. Crop the photo
Begin by cropping your photo to center the most relevant part of the picture. Don’t crop away all that you eventually want cropped, though.
Choose the Crop Tool  and hit the Clear button in the Options bar at the top. Drag the tool across your photo till your subject is centered. It's preferable to have MORE in the picture than you will ultimately keep. and hit the Clear button in the Options bar at the top. Drag the tool across your photo till your subject is centered. It's preferable to have MORE in the picture than you will ultimately keep.
|
|
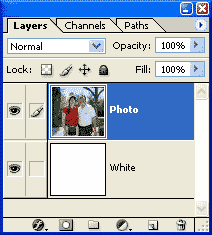
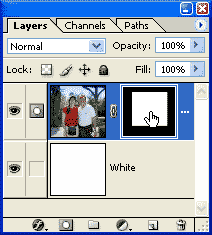
2. Set up your layers
a) Double-click your photo layer in the Layers palette to make it a regular (not background) layer.
b) Click the Create a New Layer icon (or use Layer > New).
c) Choose white for your foreground color and use Alt-Backspace to fill this layer with white.
What you have now is two layers: Your photo layer and a layer of white.
|
 |
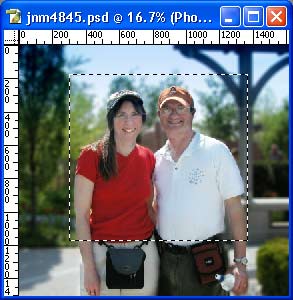
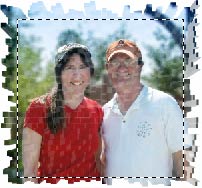
3. Make the selection
Click the photo layer in the Layers palette. Now make a selection around the part of the photo upon which you want to focus. The wider the margin you can get, the better.
Note: Turn off the Feather option in the Options bar before you make your selection.
|
 |
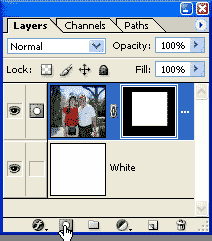
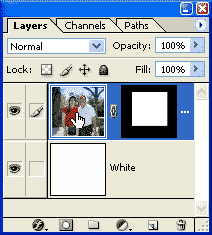
4. Convert this selection to a Layer Mask
Click the icon at the bottom of the Layers palette which has a circle inside a gray square. This will give you a Layer Mask for your photo layer which masks out the border you just selected.
|
 |
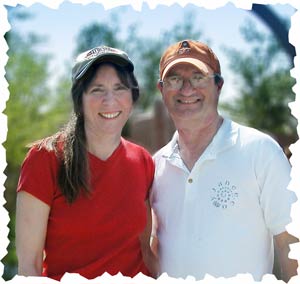
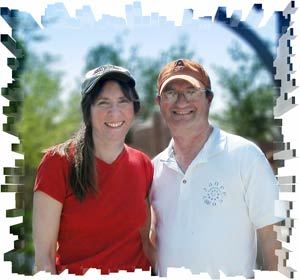
| And your image will look like this... well, it would if you were using my photo! |
 |
| When this mask is active, you’ll see the mask icon in your activity column (next to the visibility eye) in the Layers palette. |
 |
| Click the photo icon for this layer and this icon will change to a paintbrush as you see at the right ->
|
 |
| Click the mask again, because that’s what we’re going to work on. |
|
5. Have some fun
Now you can go a little (or a lot!) crazy! Whatever you do here is going to affect only that MASK, not your actual photo, so you cannot hurt anything.
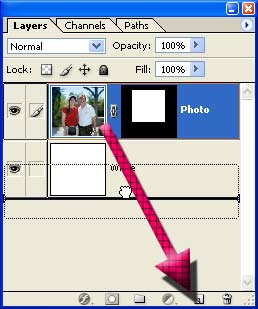
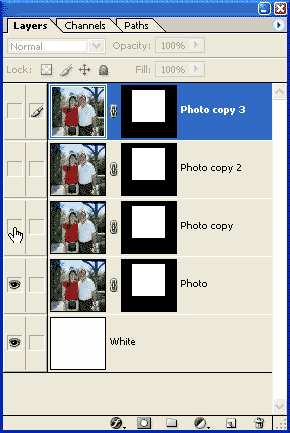
a) You may want to make several copies of this masked photo layer, so that you can play around with possibilities. To do this, drag the photo thumbnail down to the New Layer icon at the bottom of the Layers palette.
Repeat as many times as you want.
|
 |
|
b) Turn off visibility eyes at the left side of the Layers palette for any layers you’re not working on (except the background.)
|
 |
|
c) Be sure that your mask is active for the layer upon which you are going to work.
d) Choose and apply a filter to the mask.
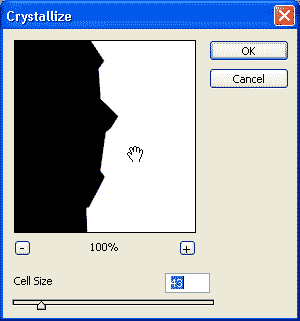
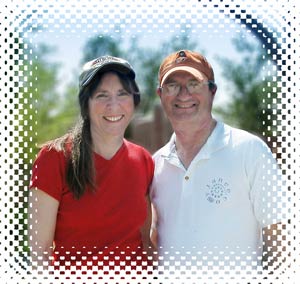
- For this edge, I used Filter > Pixellate > Crystallize, with a cell size of 43. (Your mileage may vary, depending upon the size of your picture.)
TIP: View your image at it's finished output size to be sure that your edge is as pronounced as you want it. Do this with your Zoom tool  . . |
|
 |
| TIP: Can't see the edge in the preview window? Hover over the window and your cursor will turn into the Hand tool. This enables you to drag the preview around till you can see what you seek! |
 |
|
- For this version, I used Filter > Distort > Glass, with settings of 14, 3, Tiny Lens, 190%. Again.. your settings will be different, depending upon the size of your photo and the size of your desired edge.
|
 |
- Here -- How cool is this, anyway? -- I used Filter > Stylize > Extrude, with the following settings: Blocks, 30, 30, Random....
|
 |
|
This made the block pattern over the entire mask, though, not just the border. So I want the mask to be plain white where the photo is. Select > Reselect.
Fill the mask with white so that this part of the photo shows again. The result is the pic in the previous frame.
|
 |
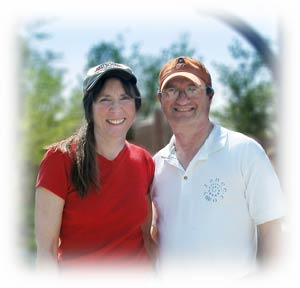
- For a simple vignette, use Filter > Blur > Gaussian Blur, extending the blur as far as you can, whilst leaving some white around the very edge.
|
 |
| TIP: DO be careful not to take the border all the way to the rectangular edge of your photo, as this looks really bad. You may need to extend your canvas and clone more border onto your photo layer so that you don’t chop into your photo. |

|
|
|
I hope you enjoyed this tutorial!

|
|
|
|
|
|