Tilings -- Making them Seamless Tilings -- Making them Seamless
Continuing in the pattern series, this third tutorial deals with tiles, which are no more than a more complex application of a pattern. In mathematics this is called a tesselation. We will do two different kinds of tiles. First, we will tile a canvas with grass and clover, and in the second example, we will examine a hexagonal tiling.
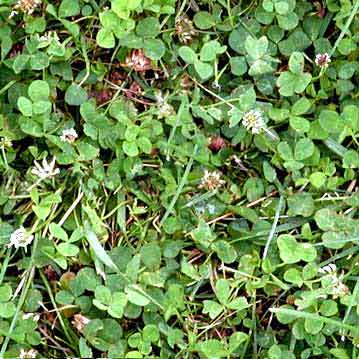
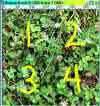
Four-leaf Clover Patch
Here, we will take an image and make it into a seamless tiling, that is, so that we can't tell where the pieces join togetner. In this way, you can make an endlessly repeating tiling for a background for artwork, for a website background, etc..
As you work through this tutorial you will learn or review these techniques:
- Using the Offset filter.
- Defining a pattern.
- Filling an area with a pattern.
|

|
|
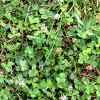
Choose a photo that is rather like a texture, whether rocks, sand, jellybeans, or a 4-leaf clover patch like mine. If you don't have a "texture" type of picture with which to work, you may use mine for the purposes of this exercise.
In this sort of picture, when you start out, the center part is seamless. That is, there are no breaks in the rhythm. the picture flows right across. If we were to put another copy of it next to the first one, however, you would see seams where they are joined. So the center of the picture is not the problem; it is the edges. What we are going to do, then, is bring the edges of the picture to the center so that we may then work on them.
We do that with the Offset Filter as above. Here's how:
1. File -> Open and find the file for the image that you want to use for your tile.
In order to create the effect we are looking for, we are going to sort of turn the image inside-out. We are going to move each part of the picture to its opposite corner leaving all of what are now the outside corners in the inside.
Believe it or not there is a filter that does this part for us.
|
|
|
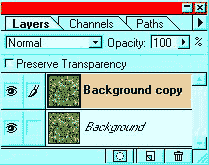
1. File -> Open and find the file for the image that you want to use for your tile. Drag your texture layer, in my case, the grass, to the New Layer icon in the Layers palette to duplicate it.
|
 |
|
2. Go to Image > Image Size... and make a note of what the pixel measurements are. Leave these alone and hit OK.
With the top layer of the two selected in the layers palette, Filter -> Other -> Offset .. Make your horizontal and vertical offsets exactly half of what your tile's measurement is now.
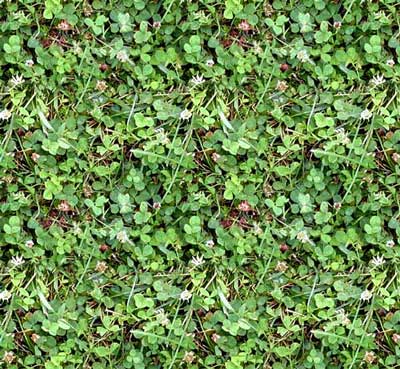
And.. like magic! It is inside out!
You might have to look closely (as in mine) to see the seams, but we want them to be completely undetectable. You need now to blend them into the rest of the picture.
|
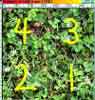
(what the offset filter does)
|
| 3. Depending upon your subject, there are various
ways to blend them. Since my tile is such a busy subject and it is GRASS,
I can get rid of the seams in the middle by simply erasing the seam parts
out of the tile, letting the center cross-shaped part of the original tile
that we left underneath show through. Neat trick, eh? Don't erase just
straight across or it will look just about as bad. Instead, erase with
little jaggy strokes.
You may want to clone some areas of the tile using the Rubberstamp Tool in order to maintain the naturalness. Just be careful to hide any obvious repeats if you use the clone tool.
My result would have been better had I cloned out that dark brown patch of clover in the upper left part of the tile. Parts of your tile that "stand out" will look repeated in your final result, which, in this case, is not desirable.
Continue on to Part 2 and 3 for more tiling fun, including making a beehive tiling, in Part 3!
|
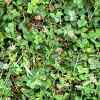 My finished tile My finished tile

 And the tile in use! And the tile in use!
|
|
|
Part 2 -- Rock Wall tiling  |
|
Part 3 -- Hexagonal tiling  |
|
|
| Student Work
|
|
I hope you enjoyed this tutorial!

|
Want more pattern tutorials?
 
|
|
|
RETURN to Janee's Archive Tutorial Index
email me!
Ask tutorial questions in the myJanee.community:

|
|
|
| All material in this site is ©2001-2003 by myJanee.com Graphic Creations. No part of it may be used without my written permission. If you have questions or comments about this site or its construction, contact Janee at myJanee.com Graphic Creations by email. |
|
|
|
|