 |
Building a Bulletin Board in Photoshop
Part 2: Making the Frame
|
 |
|
|
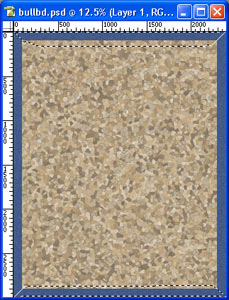
We made a corkboard texture over in Part 1 of this tutorial. Now we'll continue on to Part 2, where we will frame the corkboard!
| This tutorial will work just fine with either Photoshop or Elements. I wrote it using PS CS, so the screenshots are from that program. If you're using another version, or Elements, your screen will look a bit different from mine, but you'll get the same results. |
Much of the success of an illusion depends upon its context, and a bulletin board is no different. While this may look quite ordinary as it is, once we get our corkboard framed, it will assume a real bulletin board identity!
For this frame, we’ll make a mitred stained-wood frame. Mitring the wood may seem like an unnecessary detail, but it just adds one step to the process and really improves the realism of the frame.
As you work through this tutorial, you'll learn or practice the following:
- Using the Rectangular Marquee
- Using the Polygonal Lasso
- Following directions ;)
- Using a blur to create a realistic texture
- Using a Layer Style to make the frame 3D
|
|
|
|
a. Make a new layer and name it “Frame.” Alt-Backspace to fill the canvas with the color you want for your frame.
Use the Rectangular Marquee to make a smaller selection for the cutout of your frame.
Press the Delete key on your keyboard to delete the pixels inside the selection.
For a stained wood texture, we'll begin by adding noise to this frame:
Filter > Noise > Add Noise. I used 20%.
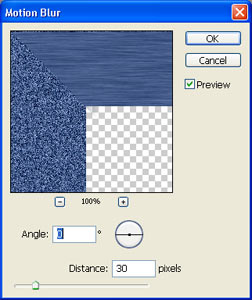
We’ll use a Motion Blur for the woodgrain, but for the wood to appear mitred at the corners, as it generally is with wood frames, we need to run this motion blur horizontally for the horizontal crossbars and vertically for the vertical bars.
|
|
|
b. We first make a selection of the horizontal pieces:
Using the Polygonal Lasso tool, click first at the inner top left corner.
Click again at the inner right corner.
Click at the outer right corner,
and then double-click at the outer left corner.
This will give you a trapezoidal selection of just that top bar.
Hold Shift to add to your selection, and then select the bottom bar in the same way.
|
 |
| Filter > Blur > Motion Blur. Set the Angle at 0° and the Distance at 30. Your preferred distance will vary, based upon the type of texture you want, and the size and resolution of your file, so experiment! |
 |
|
c. Select > Inverse. This selection looks very much like the one you just had, but it is actually everything BUT the horizontals, in other words, the verticals!
Filter > Blur > Motion Blur. This time, use an Angle of 90°. This gives us a perfectly mitred corner! Ctrl-D to deselect.
|
|
|
d. Add a Layer Style to the Frame layer to give it a 3D quality. I first linked the frame and all the other layers, transforming the whole bulletin board a bit smaller, to allow space for the drop shadow. Press the Enter key to complete the transformation.
In Photoshop, press the  button at the bottom of the Layers palette to bring up the Layer Styles options. I gave this a drop shadow and a small Chisel Hard bevel. Click the words to adjust the attributes. button at the bottom of the Layers palette to bring up the Layer Styles options. I gave this a drop shadow and a small Chisel Hard bevel. Click the words to adjust the attributes.
[Elements users, click the Layer Styles tab.]
|
|

Here's a close-up corner of my bulletin board at this point.
|
| Now let's head over to Part 3, where we'll make a round-headed pin for this bulletin board!
|
|
|
|
|
|
|
|
All material in this site is ©2001-2004 by myJanee.com Graphic Creations. No part of it may be used without my written permission. If you have questions or comments about this site or its construction, contact Janee at myJanee.com Graphic Creations by email.
|
|
|
|
|