 |
Website Interface with Rollovers
Part 5: Setting up the Rollovers in ImageReady
|
 |
|
We left our damsel all sliced up and saved in PSD format in Photoshop. Now we will go into ImageReady to make these slices into Rollovers.
1. Jump to ImageReady.
Push that button at the bottom of the Toolbox and this will open your current file in ImageReady, Photoshop's get-it-set-for-the-web application.
2. Have a look around.
If you're like me, and even if you're not, you probably don't look at ImageReady every day, so you'll probably need to look a bit at ImageReady to orient yourself. We will be working with the following palettes at this point:
|
 |
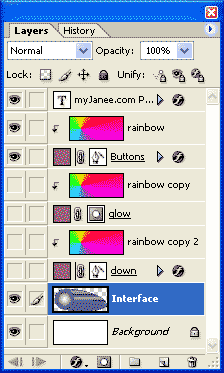
- Layers: Nearly identical to the Layers palette in PS.
|
 |
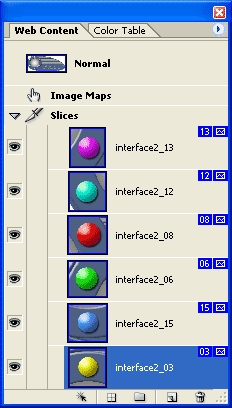
- Web Content: This is where you make rollovers and keep track of them. It is also where you keep track of image maps. You can choose which slice to work on by clicking it in this palette or by using the Slice Selection tool.
|
 |
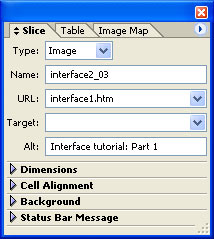
- Slice: This palette is where we do stuff to name the slices and states. We can also designate where pushing this button will take our visitor.
3. Fill in all the labeling for your slices.
The Slice palette is where we'll do our image labeling. Labeling your images is the best way to save yourself lots of time later on.
Notice that the name of the selected slice has been given this oh-so-descriptive name "interface2_03." I'll change that to "yellow."
I've made it so that my visitor will go to interface1.htm when this button is clicked, and the Alternative Text, which a visitor will see if the button doesn't show up, is Interface tutorial: Part 1.
Fill in all the information for all of your buttons in the Slice palette, by clicking each in turn and typing in the new names.
|
 |
4. Make your Over States.
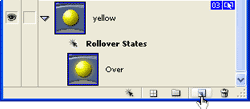
- Choose one of your buttons with which to begin. Click the Create Rollover State button, which is at the bottom of the Web Content palette.
Your new state will look just like your normal state, but that's about to change.
|
 |
- In the LAYERS palette, turn ON the two layers for the Glow. There are two layers, remember, because the rainbow layer is grouped with the glow layer.
|
| TIP: The default first state to do is the Over state and it is so labeled. If you want to make a different state, you can right-click that Over state and make it a different state using "Set State." |
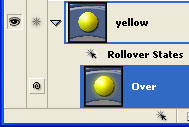
At this point, your Over state in the Web Content palette will show your glow.
|
- Continue in this way for each of your Slices, making a new rollover state and then turning on the glow in the Layers palette.
|
Tip: To speed things up a bit, you can copy-paste your rollover state:
- Click your first Over state in the Web Content palette.
- Use the flyout arrow in that palette and choose Copy Rollover State.
- Now make a new Over State for your next button.
- In the flyout, choose Paste Rollover State.
|
|
5. Make your Down States.
We make the Down State in the same way we made the Over State:
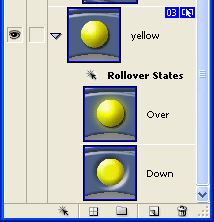
Begin by clicking one of the buttons and then click the New Rollover State button at the bottom of the Web Content palette. This will be labeled Down State.
Use the visibility eyes to make the down states visible in the Layers palette, and turn OFF the visibility for the Glow and the Buttons layer.
Your Down state should look like a pushed-in button.
| TIP: If you have trouble seeing the details in your Web Content palette, you can enlarge the thumbnails, just as you can in PS's Layers palette.
Use the flyout arrow at the top right of this palette and choose Palette Options. That's what I did to make this palette easier to see!
|
|
 |
|
Save your file in PSD format and then let's roam on over to Part 6 to see how to save this for the web!
|
|
|
|
![]()
![]()