 Postcard Text 2: Postcard Text 2:
Using a Layer Clipping Group
In this tutorial, we will use a Layer Clipping Group to make Postcard Text. This, as I explained in the first tutorial in this series, is text with pictures inside it, as you often see on postcards.
This particular method is actually best when you're using ONE photo and making it show through the text. Here, we will use a collage of photos. If you are using just one photo, and don't want to read about how to blend photos together using Layer Masks, jump all the way down to step 6.
Now.. a Layer Clipping Group sounds hairy and scary, I know. I postponed learning about this, thinking that this was some esoteric, weird, and undoubtedly difficult, process. But, in fact, it is FUN and I am confident that you will agree.
As you make your postcard, you will learn some tidy tricks with Photoshop. Here are some:
- Combining images to make a colllage using layer masks
- Using the type tool to make text
- Making a Clipping Group.
- Loading a selection
- Modifying a selection
- Filling a selection
This tutorial is written with beginners in mind, so even if you are just starting out with Photoshop, if you want to try for this effect, let's go!
The photos in this tutorial were taken at the West Baden Springs Hotel in West Baden, Indiana. This is a lovely hotel from the early 20th century that is being beautifully restored.
If you wish to use these photos that I did to complete this, then you can find them here:
Photos from West Baden, Indiana
The photos that I have used in demonstrating this are my own and may be used only for purposes of completing this tutorial. Any other use requires my written permission.
|


Brute Force Method
This is fine for when you have just a quick job to do and don't remember right off how to do the other methods.

Clipping Group Method
This is probably best when you have ONE picture or composite to go behind a block of text.

Paste Into Method
This is the easiest way to handle pasting different pictures into different parts of the text.
This tutorial was written with screenshots from Photoshop Version 6.01. Everything here can be done with PS version 5.*, though the screenshots may be slightly different.
|
| Our plan is this: Make the text. Make a composite image from our photos that will serve as our fill for the letters. Fill the letters. Trim it up. So off we go!
1. File -> New. Make your canvas larger than you think you would ever want. (I used 1500 x 1000 pixels. If you want to make your canvas smaller, you can, but you will have to make your photos smaller if you are using mine.)
2. Use your Type tool to put some bold black text on your canvas. Below are my settings on my Text Options. I added an upper arc warp too.
Note: For more on creating text in PS 6, see Just my Type, another Janee tutorial.
|
 |
| 3. Open your files (one at a time if you are RAM-challenged).
Click on your Background layer on your new file first, and, using your Move tool, drag each of your images onto your new canvas. (This will copy them above your background layer, but under your text layer.)
Close your individual images after you move them onto your new canvas.
|
|
| 4. Now we are going to combine the images into a sort of collage. How you do this will be up to you and will likely depend upon your images. I did mine with the same method as in my Fading Images into One tutorial. Consult that tutorial for the details if you need to, but i'll go through an outline here:
a. Drag each of your images to the part of the canvas where you want them to end up. For mine, i moved the elf to the lower left corner, the Mineral Springs photo to the top, the outside view to the lower right, etc.
File -> Save as.. and give your file an appropriate title and location. Save it in psd format and leave it that way till you are ready to do something with it.
Now you want the edges to fuzz into the other image so that you don't have those harsh lines demarcating the pictures.
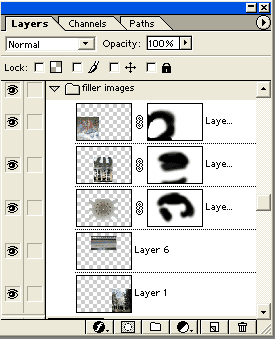
b. Click on your top image in the layers palette. Then click the "Add Layer Mask" icon at the bottom of the palette. (2nd button from the left, with the little circle in it)
c. Choose a soft brush and, using black, paint on your canvas over the edges of this top picture and watch them fade away! Powerful stuff, these layer masks!
Ctrl-s to save.
|
 |
|
d. Click on the 2nd layer and do the same thing, using your move tool and scooting layers around if you need to.
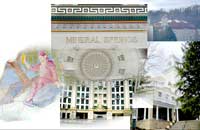
To fill in the letters, you will not need a perfect border-to-border collage presentation. You just want it to fill the letters. My finished ready-for-letters collage is to the right.
Once you get your collage the way you want it, merge these layers. (With the top one selected in the layers palette, ctrl-e to merge down.)
Ctrl-s to save.
|
 |