  PS Painting 1 PS Painting 1
Brushes in PS 7
|
| The painting tools that were developed with version 7 of Photoshop are dizzying in their variety, their adaptability, and their uses.
Previous versions of PS had spacing options and shape options that you could adjust for the round brushes and there were shape and opacity dynamics which you could adjust. You could use the brushes with either the standard paintbrush or the airbrush. Well, hang onto your hat. Version 7+ brushes will blow you away!
PS 7 and later versions come with nearly 100 pre-made brush tips that you can load. For each of these brush tips, there are at least 11 different attributes which can be toggled on or off or adjusted, some in infinite ways.
I think that for really getting into these and learning what all is there, the best advice that I could give you is just to play with them. Try things, keeping in mind that you cannot break the program. For now, though, let's have a look around.
This tutorial is written with the beginner in mind, but it should also prove useful to people who have been around the block with Photoshop's older versions and want to get up to speed with the new painting tools.
Although this tut was written for the use of PS 7, do read it, even if you have older versions. You may get some examples of things you can do. And, if nothing else, you will come away with a burning desire to upgrade!
|
My goal for this tutorial is to provide a guided tour through some of the capabilities of the brushes. This is in order that we may feel more like we know what we are doing with them, and be able to use them to accomplish our goals. I have divided this tutorial into sections, and I discuss the learning objectives of the other sections below.
In particular, in this tutorial, you will learn these:
- The qualities of the Airbrush.
- What's special about the Pencil.
- How to use Brush Presets.
- Making your way around the brushes palette.
- What each of the brush attributes means.
- What each of the brush attributes does.
- Some things that you can do with each of the brush attributes.
- Making and using your own brush preset.
- How to choose a brush to do what you want.
- How to load brushes.
- Some brush shortcuts.
- Some tips for using brushes for everyday tasks.
|
| Many of the tools use brush tips, but, in this tutorial, I am just going to deal with the paintbrush, airbrush, and pencil. This tutorial will not deal with the art history brush either, as that will be enough for a whole tut itself. |
Part of what I try to teach in my tutorials is good working habits, so I will have you save this work. Even if you are just learning and scribbling, you never know when you may do something that you may want to keep. And often when you are "just scribbling," you will get carried off into doing something pretty involved, something that, should your power go out, you would NOT want to lose. It is always a good idea to save your work!
|
|
| I've already stated that the array of options for the painting tools for Photoshop version 7 is dizzying. Well, let's try to get un-dizzy by having a look at what's offered with the new brushes.
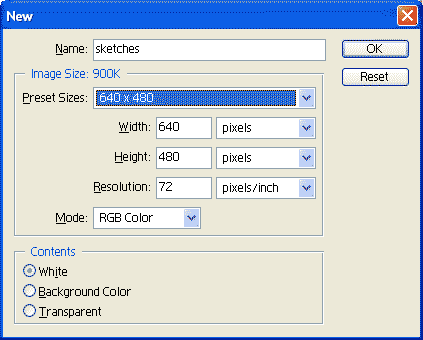
File -> New. Make your canvas as large as you can fit onto your screen. Name it sketches. Click the New Layer icon at the bottom of the Layers Palette to make a new layer.
|
|
|
 Choose your Brush Tool from the Toolbar (see left). Choose your Brush Tool from the Toolbar (see left).
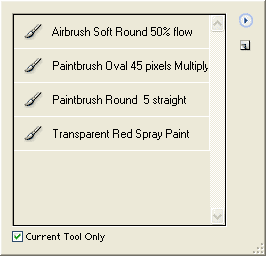
Now have a look at the screenshot just below.
Let's first look at the Tool Presets. Click the tiny arrow there. Then at the bottom of the box, click a check into "current tool only." Otherwise it shows all the presets for all the tools and we don't need the others right now.
|
(If you see a pencil there instead of the brush, click the pencil and hold it. This sends out the flyout from which you can choose your brush. Each of the tools with the tiny arrow at the bottom right has more tools under it!)
|
 |
|
|
|
Choose Transparent Red Spray Paint and then paint a swath across your canvas. If you have a drawing tablet like my Wacom Intuos or the Wacom Graphire, you will be able to vary the width of the spray depending upon the pressure you put on your pen!
If you go over this again and again, you see that the paint darkens, just as if you were spraying from a can!
Click on the other presets and try them out too.
When your canvas is full of stuff, either turn off the eye on the layer and make a new layer, or drag the layer to the trash can in the layers palette and make a new one.
When you have something there, File -> Save.
|
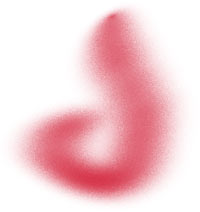
Note: If you are NOT using a pen/tablet, you will not be able to do the pressure-sensitive brush effect which I show here. These include the shape dynamics which are pen-controlled and other pen-controlled options. You CAN get by without these effects, but I'll tell you this: if you are into Photoshop, a tablet is as essential to you as your Hard Drive. If you don't have one yet, you just don't know how much you love it!
|
Next, click on either the Brush Sample or the Brush Preset Picker. Clicking on either one will give you the Brush Preset Picker.
Click the little arrow to the top right of this Picker window and you will see all the options for this palette. Choose "Small thumbnails" if you want your view to look like mine. Try Stroke Thumbnail too. I can see how this one could be useful, too.
Choose the Grass Brush. (You can see the names of the brushes if you hover over the brush in the picker.)
Choose an appropriate green for your foreground color in your color picker and another green for your background color. Set Opacity and Flow to 100%
Now "plant" some grass! Woo hoo! Gardening without the need for sunscreen!
|

If you are still drawing with a mouse, I urge you to look into a tablet. The industry standard is the Wacom. Their Graphire line is a fine tablet and can be had for under $100 USD. The Intuos tablets have more levels of sensitivity and some more features and are considerably more pricey.
My advice is to get the Intuos if you can spare the money and you are planning to use your tablet in your work or for more than a few hours a day. Otherwise, get the Graphire. It is a great tablet. I have one of each.
As for size, there are some tips on the Wacom site regarding this. If you are into broad sweeping arm movements for doing art, you might be more comfortable with a larger tablet. The larger tablet can also be mapped so that you can use only a part of it for some applications.
For most users, though, the 4x5 size of the Graphire is dandy. Intuos comes in 4x5, 6x8.. and some bigger ones, all the way up to 9x12. My Intuos is 6x8. Keep in mind that, at the end of a long day, lots of arm movements will leave you hurting in your shoulders, back, elbows, and wrists. As a carpal tunnel syndrome survivor, I can tell you that the small tablet rules for me.
I have not been compensated in any way for this endorsement. :)

|
| The Airbrush
The Airbrush in PS 7 is more of an attachment to the regular paintbrush than its own tool. You choose the paintbrush and then click the airbrush button to make the brush act as an airbrush.
Two useful options for use with the Airbrush are flow and opacity, which you see together on the options bar. Opacity is useful if you want to build up your color slowly. Flow adjustments are most useful for delicate airbrushing operations where a glob of paint would ruin your effect.
Go back to your red spray paint under presets and change your flow to 100% to see what I mean. (Changing this will not change your preset. Next time you click it, it will revert to 25% flow.)
Notice that when you are using the red spray paint, your Airbrush button is depressed because this preset uses the airbrush.
|
|
The airbrush is a very handy tool for many uses. I particularly like it for applying shading and highlights with my pen and tablet, because it affords a great deal of control. What it does is to release more paint when you hold it on your canvas.
|
|
|
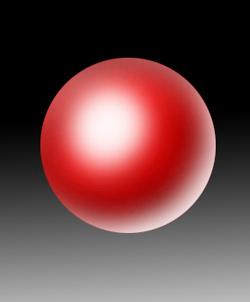
A Red Rubber Ball
Click here for a short tutorial on making this red rubber ball at the right using the Airbrush!
The red ball tutorial will help you out with these:
- Making a circular selection
- Filling a selection
- Choosing a brush from the brushes palette
- Using the airbrush to shade and highlight.
- Using some keyboard shortcuts
- Making a linear gradient
- Cropping an image
- Saving for the web.
|
 |
Paintbrush vs. Pencil
Now let's examine the difference between the paintbrush and pencil, using the same brush settings.
In the Brushes Palette, Click on Brush Tip Shape. Then choose Spatter 59.
Turn on Shape Dynamics and Scattering.
Let's adjust the scattering effect. To do this, click on the WORD "Scattering." In the scattering attributes, make the scatter % about 50%.
Now choose your favorite color, check to be sure that your opacity and flow are 100%, and then, with your paintbrush, make a swath.
|
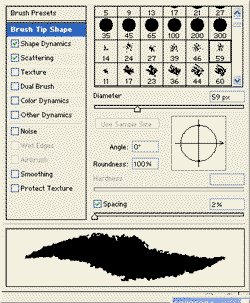
The Brushes Palette for db
|
Now switch to your pencil tool (under the paintbrush in the toolbar) and make a similar swath.
What's the difference?
(Hover over the palette to the right to read my observations.)
|
 |
|
Let's next have a closer look at the Brushes Palette. This is really the meat and potatoes of the brush functions. Click on it over to the right on your Brush Options Bar. What you will find here is the listing of many of the brush attributes which you set for your brush.
First, click on Brush Presets at the top of this palette. The kind folks at Adobe have gone through and selected some settings for you for each of the preloaded brushes.
|
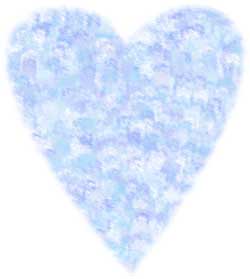
This Impressionist Heart was done with a "Plastic Wrap - Dark" brush.
|
|
Impressionist Heart
Click here for a step-by-step tutorial whose project is this Impressionist Heart to the right. This tutorial also will help with these:
- Making and adjusting a path with the pentool.
- Converting a path to a Selection.
- Feathering a selection. Adjusting brush attributes including size, scatter, and color dynamics.
- Making your own Brush Preset.
- Making a new Tool Preset.
|
 |
|
Shape Dynamics
In my example to the right, I have used a custom Janee brush for the big J. I have covered making a custom signature brush in this tutorial. A signature brush can be a very handy thing to have, for more than just drawing pretty patterns with your own name. So go and check out that tut. I'll wait here.
What I want to do now is that swath of brightly-coloured flowers that crosses this picture. Just two strokes of the right brush is all this takes in Photoshop 7!
Click your Brush Presets to the left on your options bar. Now pick the flower brush.
Choose your two favorite bright colour for your foreground colour and another bright color for your background. Then make a swath of flowers across your canvas. What do you think of that?! If you have a tablet, experiment with different pen pressures.
Click on your Brushes Palette now to see what Adobe chose for your presets for this brush which gave us this effect.
Click on the words "Shape Dynamics" to see the settings. Move these sliders and watch your stroke thumbnail.
Do the same with the Brush Tip Shape and move the spacing slider. What spacing does it look like that I used for my flowers?
|
Notice that my flowers are not as crowded as they are in your stroke thumbnail. Click on "Scattering" (the word) and then move the slider for "Count." "Count Jitter" refers to the variation of the number of flowers packed together. Experiment with this.
|
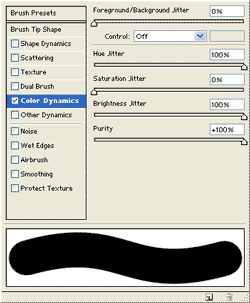
| Next have a look at Color Dynamics. Move all of those sliders, and make a swath with one at a time set at 100%.
With a bit of practice, you will be able to predict what your result will look like based upon where these sliders are. For now, like me, you will likely have to make a few attempts before you get the look you are wanting.
A. All sliders to the left
B. Fore to Background Jitter 100%
C. Hue Jitter 100%
D. Saturation Jitter 100%
E. Brightness Jitter 100%
F. Purity -100%
G. Purity 100% (This means how close your colors you get are to the foreground (background) in saturation level.)
|

|
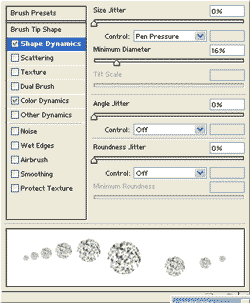
| Here are some more "Fun with Dynamics" examples. The Brushes Palette for each example is to its right:
This one is one of the Sampled Tip Brushes with which PS ships. You have to load it.
|
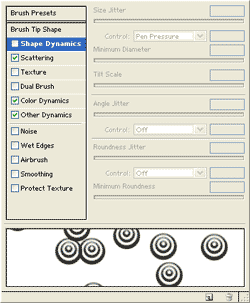 |
|
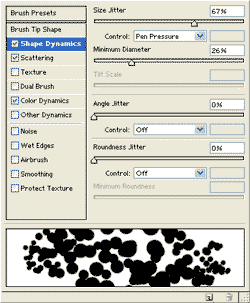
Shape dynamics and a pen/tablet enable you to start your stroke with small dots and then get bigger, finishing up with small ones as I did in this logo.
|
 |
|
Happy Scattered dots with varying sizes and Foreground -> Background Jitter.
|
 |
|
|
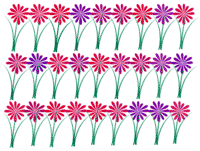
Painting in a straight line. Set up your brushes right and then you can "plant" these flowers (right) in 6 taps of your brush!
- Click at the beginning of where you want your straight line to start.
- Hold Shift and click at the end of the line.
Using Guidelines (pulled from your rulers) will help you to keep them square.
|
 |
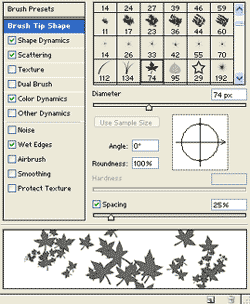
Once you get your brush settings fixed, one stroke and you have a nice random leaf pattern!
|
 |
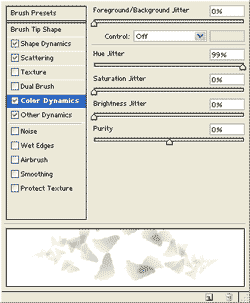
I think that this looks like black opal. To make the translucent colored flecks show better against the black, I did the flakes on a separate layer and then duplicated it twice.
|
 |
I think that this charcoal brush reshaped and angled as i have done makes a cool rain effect.
|
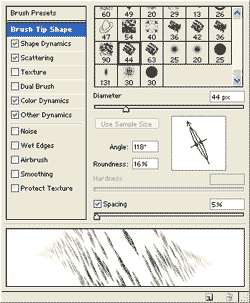 |
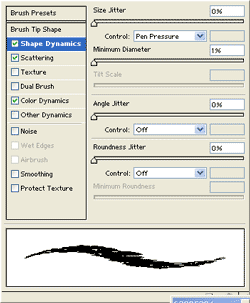
The same charcoal brush as used for the rain above makes a very different effect when given a differnent angle (under brush tip shape), color jitter, closer spacing, and less scatter.
|
 |
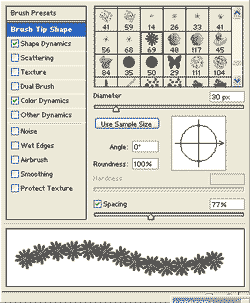
Flowers Along a Path
What might have been quite difficult to do smoothly becomes a matter of choosing settings in the Brushes Palette in PS 7.
Click here to see a detailed tutorial on this effect. In this tutorial you will learn/practice these skills:
- Making a path.
- Adjusting the spacing for a brush.
- Adjusting Color Dynamics for a brush.
- Stroking a path.
- Making a "Utility Brush" and storing it right at your fingertips.
|
|
|
|
Texture and Preserving Texture
By using a textured brush, you can make it look as if you are painting on a textured canvas as you stroke.
With these shamrocks, we start off with a textured background and then use PS 7's new "Preserve Texture" setting to make it look as if the painting is done right on the textured canvas.
Begin by filling the background layer with a texture. This texture came from Edit -> Fill -> Pattern.. and then choosing the "Wax Crayon on Charcoal Paper" texture. It comes with PS 7, but you may have to load it. (Click the drop-down arrow for Contents, then on ITS dropdown arrow to the top right, choose Artists' Surfaces.)
|
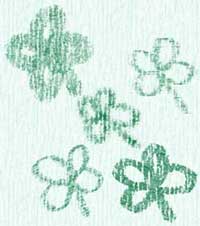 |
To get the nice color tone to the background, put a colored layer under the textured one, and on the textured layer, choose a layer blending mode of Soft Light (Experiment with these; you can get some very cool effects! You can get different, though still cool, effects by putting the colored layer on top.)
|
|
|
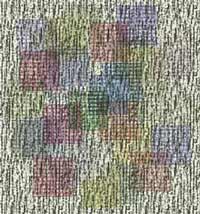
Here is another example of painting with texture.
Make a new layer and choose your Brush tool.
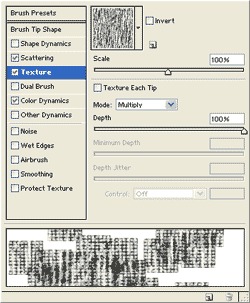
Click the dropdown arrow next to the Brush Sample in the Options Bar (your Brush Preset Picker). You'll see your current Brush Library. Click the flyout arrow at the top right on this box. Choose Faux Finishes.
Now go to your Brushes palette. Under Brush Tip Shape, choose Mesh - Large.
Click Texture (the word) and choose that same texture in the options that you have for your background.
|
 |
|
For Color Dynamics, slide Hue Jitter over to the right to give yourself some excitement.
You can either use a profoundly scattered dynamic, or you can just paint in one at a time. When you do one at a time with hue jitter at 100%, you get a surprise with each click (tap)!
|
 |
Fun with Round Brushes
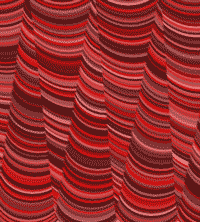
In all of these last four examples, I used round brushes, and different color jitters. Amazingly fun stuff! You can even use round brushes to come up with a reasonably convincing rope effect.
|
 |
|
jjj
|
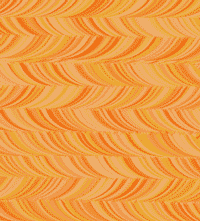 |
| To make "Waves," I used a similar technique to that of SemicircleV, above, but i did two layers of it. Then I used a blending mode of Lighten, on the top layer. |
|
For Poker Chips, I used a round brush, various color jitters, shape adjusted off-round.
Stroke bottom to top. Finish with custom shading.
|
For Manic Layers Palettes, I began by making a screenshot of a layers palette. Then I made this into a custom BRUSH! I have covered making a custom brush in this tutorial. Adjusting the "roundness," giving it hue and size jitter, made it easy to paint these onto the canvas. Now.. how did i get the white backing on them?
|
| I hope that this tutorial has shown you around the features of the PS 7 brushes.
In the next tutorial I write, I'll work on some techniques to MANAGE workflow to make use of these brushes efficient.
For more on using the painting tools in Photoshop 7, see
 A Red Rubber Ball A Red Rubber Ball
 Impressionist Heart Impressionist Heart
 Flowers Along a Path Flowers Along a Path
|
 |